Project planning guide
Before you build
Use the reference image and planning notes as a starting point. Confirm dimensions, loads, materials, local codes, and site conditions before purchasing or cutting.
- Garage Projects
- 1 reference image
- Print-friendly guide
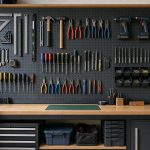
Visible tool storage shortens setup time and makes missing tools obvious. A wall organizer should be adaptable because a workshop collection rarely stays the same.
Plan the project
Lay tools on a full-size board before drilling anything. Put frequently used items between waist and shoulder height. Keep sharp edges protected and heavy tools close to mounting points.
Build for strength and serviceability
French cleats allow holders to move as needs change. Fasten the main rail into studs and build individual racks for chisels, squares, mallets, and measuring tools. Leave expansion space for future holders.
Finish and use it well
Use a light finish so silhouettes remain easy to read. Label uncommon storage positions and avoid deep shelves above eye level. Test every holder by removing and replacing the tool several times.
Adapt dimensions, fasteners, and structural details to your materials, site, and local requirements. Use appropriate personal protective equipment and consult a qualified professional where structural, electrical, or code questions apply.
Inventory before layout
Arrange the tools on a sheet of cardboard in the order they are normally used. Record handle length, blade exposure, weight, and the space needed to remove each item. Frequently used tools belong between waist and shoulder height; heavy or hazardous tools need secure positions that are not above a person’s head.
Build adaptable holders
A cleat system, removable blocks, or replaceable panels allow the organizer to change as the tool collection changes. Provide positive retention for saws, chisels, and sharp edges rather than relying on shallow pegs. Test each holder with the wall panel flat on a bench before installation.
Mount to real structure
Locate studs or install suitable blocking and calculate the combined panel and tool load. Use fasteners intended for the wall construction and maintain required edge distances. Keep the organizer away from doors, electrical panels, damp walls, and areas where long handles project into a walkway.
Shop checklist
- Label outlines or locations so missing tools are obvious.
- Protect cutting edges from contact with adjacent tools.
- Leave room for fingers when removing an item.
- Seal the panel to simplify dust removal.
- Recheck mounting fasteners after the rack has been fully loaded.
Design holders from an actual tool inventory
Photograph and measure the tools before laying out the panel. Group them by workflow, weight, handle shape, and how often they leave the wall. A row of identical slots looks orderly but wastes space when tools vary. Prototype unusual holders in scrap and remove each tool with one hand. Sharp edges and heavy heads should not pass over a user’s face or an occupied work surface during retrieval.
- Place frequently used tools between comfortable waist and shoulder height.
- Provide positive retention for tools that could bounce or slide free.
- Label empty positions so missing tools are obvious.
- Leave expansion space instead of filling every inch immediately.
Verify the wall and total load
Drywall is not the structural support. Locate studs, masonry, or a securely anchored backer and select fasteners compatible with that substrate. Include the organizer, holders, and all tools in the load estimate. After installation, pull on the empty panel, add tools gradually, and inspect for movement. Periodically check split holders and loosened screws, especially near hammers and other dense tools.