Project planning guide
Before you build
Use the reference image and planning notes as a starting point. Confirm dimensions, loads, materials, local codes, and site conditions before purchasing or cutting.
- Garden Projects
- 1 reference image
- Print-friendly guide
Quick answer: A dependable raised-bed drip system starts at the hose bib with required backflow protection, a filter, and a pressure regulator. Run a 1/2-inch mainline along the beds, branch through an individual shutoff to each bed, and arrange pressure-compatible dripline or emitters for the crop and soil. Flush, test, and adjust before covering tubing with mulch.
Map zones before buying a kit
Count beds, measure the route from the water source, and group plants with similar water needs. Long runs, elevation changes, mixed emitters, and too many beds on one zone can produce uneven flow. Use manufacturer flow tables or an irrigation professional when the layout exceeds a simple home-garden zone.
Protect the water supply
Use the backflow device required by local plumbing or water rules. Install a filter sized for the emitter system and a regulator matching the tubing’s specified pressure. Component order and orientation matter, so follow the selected system’s instructions rather than mixing unrelated parts by appearance.
Lay the mainline and bed branches
- Route UV-resistant mainline along a path edge where it will not be cut by tools.
- Secure it with stakes without pinching the tube.
- Add a tee or connector and shutoff valve at each bed.
- Run lateral lines across the bed at spacing suited to soil and plants.
- Cap each zone with a flushable end.
- Pressurize and flush debris before installing final end closures.
Choose emitter spacing by soil and crop
| Condition | Planning response |
|---|---|
| Sandy mix | Water spreads less sideways; closer lines may help |
| Clay-rich mix | Apply slowly to avoid ponding and runoff |
| Closely planted greens | Parallel inline drip lines |
| Widely spaced plants | Individual emitters where appropriate |
Run a catch-can or soil-moisture test instead of watering by a fixed internet schedule. Weather, crop size, mulch, soil, and emitter flow all change run time.
Add control without hiding failures
A battery timer can automate watering, but it cannot detect a cut line or clogged filter. Inspect while the system runs, clean the filter, and verify every bed. Keep connectors above or near the soil surface until the layout proves reliable.
Winterize and maintain
- Flush lines periodically.
- Clean filters according to instructions.
- Repair leaks with compatible fittings.
- Drain or remove freeze-sensitive parts before winter.
- Store timers indoors when required.
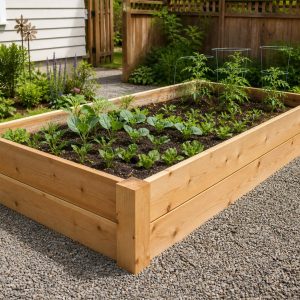
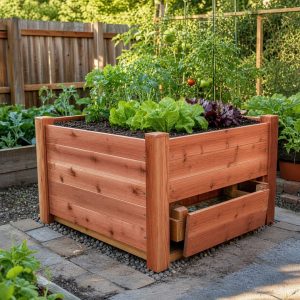
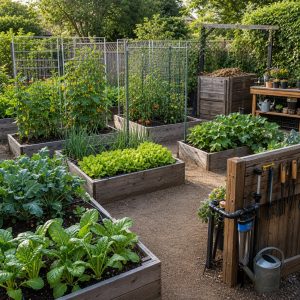
Install the system in the 4×8 raised bed. The nearby hose holder keeps the supply hose from crossing paths.
Calibrate each bed instead of relying on the timer
Emitter output, soil texture, pressure, slope, mulch, weather, and crop roots all influence watering. After installation, run each zone and dig small inspection holes at several locations to see how far moisture spreads. Adjust runtime or emitter spacing based on the root zone rather than the appearance of the mulch surface.
- Use filtration and pressure regulation specified for the selected system.
- Keep connections visible enough to identify leaks.
- Flush line ends according to the manufacturer’s maintenance guidance.
- Separate plants with substantially different water needs into different zones.
Recheck at the start of each season and after moving plants. A controller cannot detect every clogged emitter, cut tube, or dry pocket; direct observation remains part of responsible irrigation.
Common questions
Should dripline go under mulch?
A light mulch cover can reduce UV exposure and evaporation, but keep line locations known and inspectable. Do not bury hardware that needs routine service.
Can a rain barrel run drip irrigation?
Many emitters require more consistent pressure than a modestly elevated barrel provides. Use products designed for low pressure or a properly selected pump and controls.