Project planning guide
Before you build
Use the reference image and planning notes as a starting point. Confirm dimensions, loads, materials, local codes, and site conditions before purchasing or cutting.
- Garden Projects
- 1 reference image
- Print-friendly guide
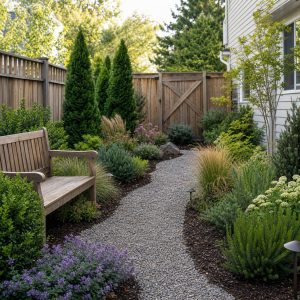
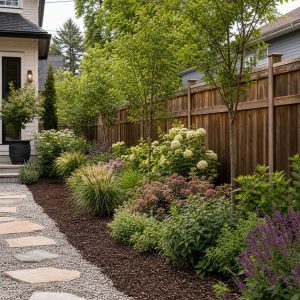
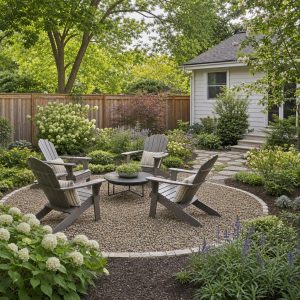
Small Gravel Seating Garden With a Curved Flower Border is a practical concept for create an affordable garden destination with movable seating. Outdoor projects succeed when proportions, footing, drainage, and access are decided together. The concept below is a practical starting point that should be adjusted to the site. The dimensions and materials are examples rather than a measured construction plan, so verify every part against the actual location, load, users, and local requirements.
Quick answer: Start with a seating area about 10 feet across. Plan around a simple gravel oval leaves generous planting depth around it. A sensible material palette is compacted gravel, edge restraint, chairs, shrubs, grasses, and perennials. Before construction, provide stable chair footing and keep loose gravel off steps.
Project concept at a glance
| Project | a compact gravel sitting area with two chairs framed by a curved perennial border |
|---|---|
| Suggested setting | a fenced corner visible from a deck |
| Planning size | a seating area about 10 feet across |
| Material direction | compacted gravel, edge restraint, chairs, shrubs, grasses, and perennials |
| Key design priority | a simple gravel oval leaves generous planting depth around it |
| Primary precaution | provide stable chair footing and keep loose gravel off steps |
Start with the location and workflow
Mark the proposed footprint before cutting anything. Place boxes, stakes, or painter’s tape to represent the outside edges, then approach the area from every direction used during normal garden work. The finished project should not pinch a path, hide a hazard, obstruct a gate, cover a utility, trap water against a building, or make routine maintenance awkward.
The intended setting is a fenced corner visible from a deck. Observe the location after rain and during the windiest or sunniest part of the day. Check roof runoff, irrigation spray, soil movement, tree roots, snow storage, mower routes, hose routes, and access for bins or wheelbarrows. Move the concept now if a conflict appears; relocation becomes harder once soil, anchors, or a heavy assembly are involved.
Confirm size with the real objects
a seating area about 10 feet across is a useful planning reference, not a universal dimension. Lay out the actual trays, pots, tools, crates, cushions, plants, or equipment associated with the project. Add hand clearance, drainage gaps, hinge movement, removable-part clearance, and enough working room to clean behind and beneath the assembly.
Keep the center of gravity low when soil, water, stored material, or a tall frame can add weight. Long shelves need intermediate support; narrow frames need a wider base or positive anchoring; doors and lids need room to open without colliding with paths. If children, public access, overhead work, electricity, plumbing, significant height, or structural loads are involved, use guidance from the appropriate qualified professional.
Choose an outdoor material system
The concept uses compacted gravel, edge restraint, chairs, shrubs, grasses, and perennials. Match every material to its exposure. Parts touching soil or supporting a permanent structure need a different durability strategy from pieces kept under a roof. Keep untreated end grain away from standing water, separate absorbent wood from masonry where moisture can linger, and use corrosion-resistant fasteners compatible with the lumber, preservative, and nearby metals.
A durable project also needs replaceable wear parts. Liners, trays, netting, cord, mesh, casters, feet, roof panels, and hardware usually age at different rates from the main frame. Design them so they can be removed without dismantling the entire project. Ease exposed edges, sand handling surfaces, and apply finishes only according to the label and the intended contact with plants, soil, food, children, pets, or wildlife.
Lay out before cutting
Make a dimensioned sketch that shows overall width, height, and depth; the position of every post or leg; the direction of rails and slats; and the location of anchors, hinges, drains, stops, and removable components. Use the actual material thickness rather than a nominal label. Recalculate openings after accounting for both side pieces, rails, liners, and hardware.
Build a simple story stick for repeated spacing. It is faster and more consistent than measuring every slat or shelf separately. Group similar cuts, label parts, and dry-fit the frame on a flat surface. Measure both diagonals on rectangular assemblies and correct the frame before adding panels or braces that lock it out of square.
Use a maintainable construction sequence
- Prepare the base. Level the bearing points, improve drainage where needed, and keep the project out of persistent standing water.
- Build the primary frame. Assemble the strongest load path first and confirm it is square, plumb, and stable.
- Add bracing and stops. Install diagonal resistance, shelf supports, wheel stops, lid stays, or retaining rails before loading the project.
- Fit removable components. Test trays, crates, liners, panels, netting, or doors with real clearance for swelling, debris, and gloved hands.
- Manage water. Drill or preserve drainage openings, slope horizontal caps where appropriate, and keep hidden cavities ventilated.
- Finish and inspect. Ease edges, seal cut ends as appropriate, tighten hardware, and test every moving or loaded part gradually.
Drainage and weather details
Outdoor durability is largely water management. Avoid flat closed tops unless they are intentionally waterproofed and sloped. Space deck-like boards consistently, provide an exit below liners and trays, and make sure runoff does not land on a doorway, foundation, neighbor’s property, or slippery walking surface. Vent enclosed storage so damp tools and organic material can dry.
Wind matters even for compact projects. Tall trellises, screens, racks, canopies, and fabric-covered frames can behave like sails. Soil-filled containers may be heavy but still need a structural connection between the planter, post, and base. For exposed or overhead structures, replace guesswork with local engineering and code guidance.
Safety and access check
The main project-specific precaution is: provide stable chair footing and keep loose gravel off steps. Also check for protruding screws, sharp wire, splinters, pinch points, unstable lids, narrow toe traps, climbable storage, and hidden trip edges. Keep frequently handled items between comfortable knee and shoulder height when possible, and store the heaviest objects low.
HomeBuildPlans.com concepts are design inspiration, not engineered drawings, certified products, accessibility designs, playground plans, utility instructions, or load-tested furniture. Call the relevant utility-location service before digging. Follow tool, fastener, finish, appliance, irrigation, electrical, and plumbing manufacturer instructions. Obtain permits and qualified help whenever the location or project scope requires them.
Seasonal maintenance
Inspect the project at the beginning and end of the active garden season. Tighten loose fasteners, replace cracked or corroded hardware, clear blocked drainage, renew finish where the label recommends it, and check every ground contact or anchor. Clean removable trays and liners before storage, and keep organic debris from building up against legs or lower rails.
If the project moves, folds, rolls, or uses removable panels, test those functions before loading it again. Replace worn cord, fabric, netting, mesh, casters, and non-slip feet promptly. A small repair made while the frame is still sound is easier than rebuilding after water or movement damages adjoining parts.
Planning checklist
- Mock up the footprint and confirm clear paths, doors, gates, and maintenance access.
- Verify the real wet or loaded weight and provide a direct supported load path.
- Match lumber, panels, fasteners, finish, and anchors to the exposure and intended contact.
- Plan a simple gravel oval leaves generous planting depth around it.
- Provide drainage, ventilation, and replaceable wear components.
- Resolve provide stable chair footing and keep loose gravel off steps.
- Photograph hidden framing and anchor details for future maintenance.
Frequently asked questions
Can the example dimensions be changed?
Yes. Treat a seating area about 10 feet across as a starting concept. Preserve the functional clearances and strengthen spans, bases, and anchors when making the project larger or heavier.
What wood lasts best outdoors?
Durability depends on exposure, local availability, maintenance, and whether the material touches soil, food crops, people, pets, or wildlife. Naturally durable species or appropriately rated treated lumber can work when used according to current labels and guidance. Good drainage and protected end grain remain important with any species.
Does this project need a permit?
Small movable garden accessories often do not, while tall, roofed, anchored, utility-connected, retaining, deck-like, or property-line structures may. Rules vary, so confirm setbacks, height limits, easements, drainage requirements, and permit thresholds locally before building.
Editorial disclosure: This article and its original conceptual image were created for planning inspiration. HomeBuildPlans.com does not sell a measured plan, kit, product, installation service, or engineering for this project.