Project planning guide
Before you build
Use the reference image and planning notes as a starting point. Confirm dimensions, loads, materials, local codes, and site conditions before purchasing or cutting.
- Garage Projects
- 1 reference image
- Print-friendly guide
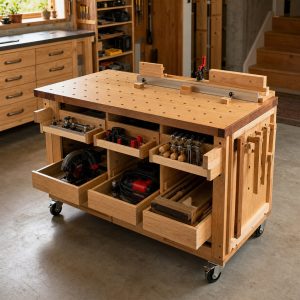
Quick answer: A versatile garage workbench is approximately 72 inches long, 30 inches deep, and 36 inches high. Build a rigid 2×4 base, add a durable replaceable top, and divide the lower area between drawers, open storage, and knee or vacuum space.
Fit the bench to the work
Thirty-six inches is a familiar standing height, but test it with a temporary surface before committing. Detailed handwork may feel better slightly higher; planing often benefits from a lower surface. Keep the depth reachable from the front—an extra-deep bench against a wall quickly becomes a clutter shelf.
Use a rigid base and a serviceable top
Build front and rear frames, connect them with end rails, and add stretchers where drawer cabinets or shelves need support. Check for square before applying panels. A laminated plywood top is flat and economical; a thin sacrificial hardboard skin can be replaced after glue, paint, and drill damage.
Plan storage in three bands
- Shallow drawers: layout tools, bits, pencils, and frequently used hardware.
- Closed cabinet: items that should stay cleaner and away from sparks or dust.
- Open lower shelf: cases and a shop vacuum that need fast access.
Keep heavy items between knee and floor level. Drawers should not collide with a vise screw, leg, outlet, or each other. Full-extension slides need a square opening, so install them only after the base sits level.
Reinforce the vise corner
A vise produces leverage far beyond its own weight. Position it over or close to a leg, laminate extra blocking beneath the top, and use through-bolts with washers where the vise design permits. Check jaw clearance before drilling. Mounting a vise in the middle of an unsupported span invites flex.
Assembly sequence
- Cut and label frame parts; reject severely twisted stock.
- Assemble front and rear frames on a flat surface.
- Join the frames with rails and check both diagonals.
- Add lower shelf supports and cabinet dividers.
- Level the base in its final position before fitting drawers.
- Attach the top so it can be removed later.
- Round exposed edges and apply an appropriate finish.
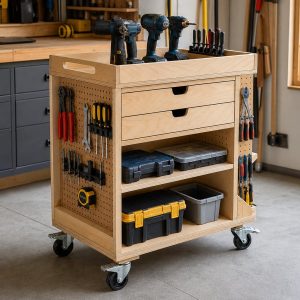
If the bench must move, review our compact mobile workbench frame. If the whole garage needs organizing first, start with the one-car workshop layout.
Design the bench around clamping and service access
Place sample workpieces on a temporary top and identify where clamps, a vise, cords, and dust hoses must pass. Drawers directly beneath the entire front edge can block clamp access. Likewise, a permanently enclosed back may hide outlets or prevent retrieving a dropped object. Reserve at least one clear clamping zone and keep replaceable services reachable.
- Reinforce vise loads through framing rather than only the top skin.
- Separate finishing supplies from grinding sparks and charging batteries.
- Use drawer stops and size slides for the loaded contents.
- Provide leveling at the floor before anchoring the bench.
After assembly, push diagonally at each corner and correct racking before loading storage. Recheck the top attachment and wall restraint after several heavy projects.
Common questions
How deep should a garage workbench be?
Twenty-four to 30 inches works for many wall benches. Choose the shallowest depth that supports your projects while keeping the back edge reachable.
Should a workbench be attached to the wall?
A fixed wall bench benefits from anchoring to sound framing. A freestanding bench needs a wide, rigid base and enough mass to resist racking; never block required access or egress.