Project planning guide
Before you build
Use the reference image and planning notes as a starting point. Confirm dimensions, loads, materials, local codes, and site conditions before purchasing or cutting.
- Garden Projects
- 1 reference image
- Print-friendly guide
Quick answer: A lasting gravel path depends more on excavation, compaction, drainage, and edging than on the decorative top stone. Lay out a 36- to 48-inch-wide route, remove soft organic soil, compact an appropriate aggregate base, install firm edging, and finish with a thin, compactable walking gravel selected for local conditions.
Walk the route before marking it
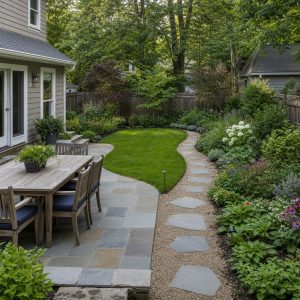
Carry a basket or push the garden cart along the proposed path. Use a hose or marking paint to create gentle curves and practical turning space at gates, beds, and the potting area. Avoid sending the path through a natural drainage swale unless the design deliberately handles that water.
Choose a width for the job
About 3 feet is a useful minimum for one person. A 4-foot path accommodates many wheelbarrows and makes passing or kneeling easier. Wider nodes at intersections keep tight turns from eroding the edges. Confirm accessible-route requirements separately; loose gravel may not meet mobility needs without stabilization or a different surface.
Test the soil and establish drainage
Dig small test holes along the route. Soft topsoil, expansive clay, tree roots, or frequent standing water can change the required base. Call the utility-location service before excavation. Grade the finished surface gently so water does not run toward foundations, sheds, wells, neighboring lots, or the raised beds.
Build from the bottom up
- Excavate the path to a consistent depth, removing sod and loose organic material.
- Compact the subgrade; repair soft pockets rather than burying them.
- Install edging high enough to retain the finish gravel without becoming a trip hazard.
- Add a locally appropriate compactable crushed-stone base in thin lifts and compact each lift.
- Place the finish gravel in a shallow, even layer.
- Rake, dampen if appropriate, and compact before judging the final grade.
The exact excavation and base depth depends on soil, freeze-thaw exposure, drainage, and expected traffic. Local landscape suppliers often know which crushed aggregate locks together in the region; round pea gravel moves more readily underfoot.
Use fabric selectively
Geotextile can separate weak soil from aggregate, but thin consumer weed fabric does not replace base preparation and will not stop windblown seeds from germinating in accumulated debris. If fabric is needed for soil separation, choose the correct type and avoid creating a slick layer that traps water.
Maintain the path
- Rake migrated stone back from bed edges.
- Remove leaves before they decay into a seedbed.
- Pull young weeds before roots disturb the base.
- Refill low spots only after correcting the cause.
- Check edging after frost, heavy rain, or wheelbarrow impacts.
Use the path around the DIY raised garden bed and route it toward the existing backyard chicken coop plan without creating runoff into the run.
Common questions
Is pea gravel good for a garden path?
It is attractive and drains, but its rounded particles shift. Angular compactable gravel usually creates a firmer walking surface; local availability and accessibility needs matter.
How do I keep gravel out of the lawn?
Install continuous edging, keep the finish layer below its top, and provide a hard transition where the path meets turf or a gate.