Project planning guide
Before you build
Use the reference image and planning notes as a starting point. Confirm dimensions, loads, materials, local codes, and site conditions before purchasing or cutting.
- Woodworking
- 1 reference image
- Print-friendly guide
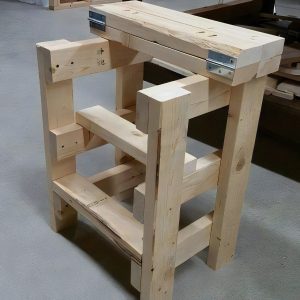
A modern sawhorse desk looks light, but its success depends on controlling side-to-side movement. The top, trestles, and connection method must work as one structure.
Plan the project
Choose a top depth of at least 24 inches for laptop work and more for a monitor. Set the finished height before calculating leg length and splay. Make a full-size side drawing so both trestles match.
Build for strength and serviceability
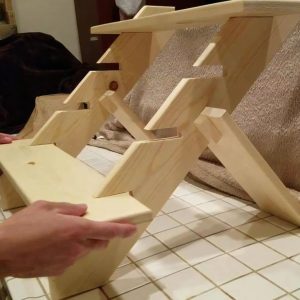
Cut paired legs from the same setup and connect them with a rigid upper rail. A stretcher between trestles greatly improves stability. Threaded inserts and bolts create a desk that can be disassembled without weakening screw holes.
Finish and use it well
Round the edges that contact arms and knees. Protect the top with a durable clear finish and use felt or adjustable pads under the legs. Confirm the top cannot slide before loading it with equipment.
Adapt dimensions, fasteners, and structural details to your materials, site, and local requirements. Use appropriate personal protective equipment and consult a qualified professional where structural, electrical, or code questions apply.
Proportion and ergonomics
Set the finished height for the chair and the work being performed. A desk that looks balanced can still be uncomfortable if the top is too thick or the trestles occupy knee space. Mark the monitor position, chair travel, and leg clearance on the floor. The trestles should sit far enough from the ends to resist sag without interfering with the user.
Build accurate trestles
Make both trestles from the same story stick instead of measuring every part independently. Mill mating parts together and compare the assemblies on a flat surface before attaching the top. Wide feet improve stability, but the foot length and brace angle must not create a tripping point. Add adjustable glides when the desk will sit on an uneven floor.
Top attachment
A solid-wood top moves across its width. Use figure-eight fasteners, tabletop clips, or slotted attachment holes rather than locking the top rigidly at every point. A manufactured panel moves less but still needs flat, evenly supported contact. Check screw length at the thinnest point before driving any fastener.
Quality checks
- Measure both diagonals of each trestle before glue cures.
- Test side-to-side racking with the top temporarily clamped.
- Verify cable openings have smooth edges.
- Apply finish to the underside as well as the visible face.
Prototype the desk before committing to joinery
Sawhorse desks look simple, but small changes in trestle width and top overhang strongly affect knee room and tipping resistance. Set two temporary supports under a scrap top and test the actual chair, monitor, and task equipment. The user should be able to move without contacting a diagonal brace, while the support footprint should remain wide enough that leaning on a front corner does not feel unstable. Mark the preferred trestle positions on the underside before drilling.
- Measure the top at both ends; construction lumber is rarely perfectly straight.
- Build both trestles from the same story stick so their heights match.
- Add floor-friendly feet that do not reduce the stance width.
- Route power cables away from braces and moving chair parts.
Design for tightening and repair
Knock-down hardware can make the desk easier to move, but connectors need enough edge distance and must remain accessible. If the top is solid wood, use attachments that permit cross-grain movement. After assembly, load the desk gradually and check for racking in both directions. Recheck fasteners after the first weeks of use, because softwood fibers and moving joints can settle.