Project planning guide
Before you build
Use the reference image and planning notes as a starting point. Confirm dimensions, loads, materials, local codes, and site conditions before purchasing or cutting.
- Garden Projects
- 1 reference image
- Print-friendly guide
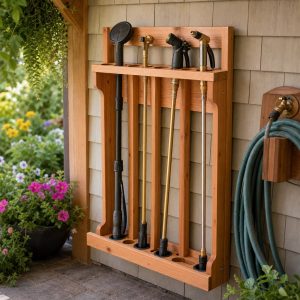
Quick answer: A wall-mounted garden tool rack needs a structural mounting rail, individual slots or dowels for each long-handled tool, and enough clearance to remove one item without tangling its neighbors. Keep heavy power equipment low, store sharp edges toward the wall, and anchor the rack to sound shed or garage framing.
Inventory the actual tools
Lay every shovel, rake, hoe, broom, cultivator, and trimmer on the floor. Measure handle diameter, head width, overall length, and the balance point. A generic row of hooks often fails because rake heads overlap, D-handles will not pass through narrow slots, and cordless trimmers project into the aisle.
Choose vertical or horizontal storage
Vertical hanging uses less wall width and makes each handle visible. Horizontal brackets may suit a low ceiling or a small collection but often require removing the front tool to reach the rear one. For a typical shed wall, a continuous upper rail with separate projecting dividers provides a simple one-tool-per-space layout.
| Item | Storage approach |
|---|---|
| Rakes and hoes | Individual vertical slots; heads above eye level only if safely contained |
| D-handle shovels | Open-sided hooks or wider slot |
| String trimmer | Two support points with battery removed when instructions recommend it |
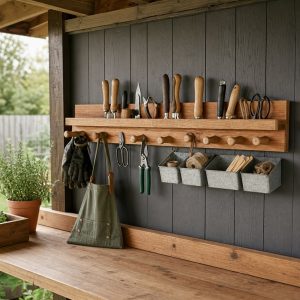
| Gloves and twine | Shallow upper shelf or labeled bin |
Build a strong mounting rail
- Locate studs or sound shed framing and mark utilities.
- Cut a straight 1x or plywood rail long enough for the complete tool set plus growth space.
- Attach paired wood blocks, dowels, or rated hooks according to each tool shape.
- Predrill the rail and fasten it to framing with suitable structural screws.
- Add a lower standoff rail if handles swing against the wall.
- Load one tool at a time and check that neighboring tools remain accessible.
Do not rely on thin wall cladding, pegboard alone, or short drywall anchors for a loaded garden rack. If the shed has metal walls or unknown framing, use the building manufacturer’s approved attachment method.
Keep the aisle and exits clear
Position the rack outside the door swing and away from electrical panels, chargers, and fuel storage. Nothing should project at face height beside the entrance. Keep gas-powered equipment and fuels according to their manuals and local fire guidance; a wood rack is an organizer, not a substitute for proper hazardous-material storage.
Create a return routine
Label or outline each position, clean damp soil from blades before hanging, and let tools dry. Store a hand broom and small brush at the rack so returning a tool takes less than a minute. The DIY potting bench can hold hand trowels and seed supplies that do not belong among long handles.
Common questions
How high should a garden tool rack be?
Set the supporting rail so the longest tool clears the floor while the user can lift it out comfortably. Test with the shortest primary user and the widest rake before drilling.
Can pressure-treated lumber be used inside a shed?
It is often unnecessary for a dry interior rack. Straight, dry lumber or plywood is easier to finish; use material appropriate to the shed’s moisture conditions.