Project planning guide
Before you build
Use the reference image and planning notes as a starting point. Confirm dimensions, loads, materials, local codes, and site conditions before purchasing or cutting.
- Home Improvement
- 1 reference image
- Print-friendly guide
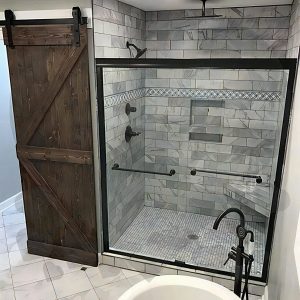
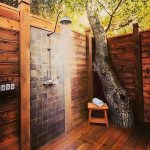
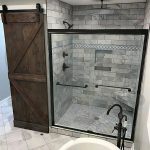
Wood tones soften tile and stone, but a bathroom demands careful material selection. The goal is a warm appearance without placing vulnerable wood in persistent splash zones.
Plan the project
Resolve waterproofing, drainage, and exhaust ventilation before selecting finishes. Identify wet, damp, and dry zones. Consider porcelain wood-look surfaces where direct water exposure is unavoidable.
Build for strength and serviceability
Use approved shower membranes and compatible transitions. Vent cabinetry and keep end grain away from standing water. Maintain access to plumbing valves and traps.
Finish and use it well
Choose stable, sealed materials and wipeable coatings. Repeat the wood tone selectively in a vanity, ceiling detail, or shelf. Good lighting reveals texture while making cleaning and inspection easier.
Adapt dimensions, fasteners, and structural details to your materials, site, and local requirements. Use appropriate personal protective equipment and consult a qualified professional where structural, electrical, or code questions apply.
Separate appearance from performance
Wood color does not require solid wood in every wet location. Porcelain tile, high-pressure laminate, engineered panels, or properly detailed wood can provide warmth with different maintenance demands. Compare products using their installation limits, slip resistance, cleaning requirements, and warranty—not the showroom sample alone.
Control water first
A decorative surface is not the waterproofing layer. Showers and other wet zones need a continuous approved water-management system with compatible seams, corners, penetrations, and drain connections. Plan slopes before choosing tile dimensions. Plumbing and waterproofing should be installed and tested according to local rules and product instructions.
Detail transitions
Pay special attention where wood-look finishes meet painted walls, glass, metal trims, floors, and cabinetry. Leave required movement joints and avoid trapping moisture behind tightly sealed decorative layers. Ventilation should remove humidity effectively, and cabinet materials need clearance from recurring splash zones.
Material review
- Obtain wet-area approval in writing from the manufacturer.
- Use compatible adhesives, membranes, grout, and sealants.
- Check sample colors under the room’s actual lighting.
- Provide access to valves, traps, and serviceable equipment.
- Document cleaning products that will not damage the finish.
Map wet zones before choosing a wood-look product
Separate areas that receive direct spray or standing water from areas exposed mainly to humidity. A product suitable for a vanity front may not be approved inside a shower or at a tub deck. Read the complete installation instructions for substrate, waterproofing, adhesive, grout or joints, perimeter sealant, and ventilation. The visual surface is only one layer; failures usually begin where water reaches an unprotected edge, penetration, or transition.
- Use compatible backer and waterproofing in direct-wet locations.
- Keep absorbent end grain and cut edges away from pooled water.
- Detail plumbing penetrations so they remain inspectable.
- Confirm the exhaust fan discharges outdoors and is used long enough.
Choose texture and maintenance together
Deep grain texture can look convincing but may collect soap residue and be difficult to wipe. Test a sample with the household’s normal cleaners and check slip resistance where the material is used underfoot. Avoid products that require harsh maintenance incompatible with nearby stone, metal, or sealants. Keep spare pieces and product information because matching a discontinued pattern after a leak can be difficult.