Project planning guide
Before you build
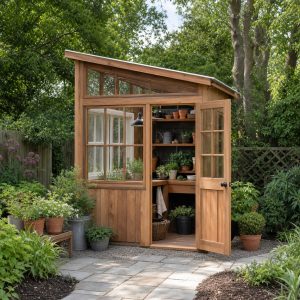
Use the reference image and planning notes as a starting point. Confirm dimensions, loads, materials, local codes, and site conditions before purchasing or cutting.
- Garden Projects
- 1 reference image
- Print-friendly guide
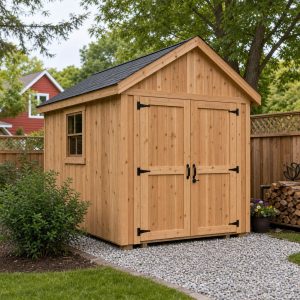
Quick answer: A small shed can often use a compacted crushed-stone pad supporting pressure-treated skids and a framed floor, but soil, frost, wind, shed size, and local code decide whether an on-grade base is acceptable. Obtain approvals first, strip organic soil, control drainage, compact in lifts, and keep every support in one level plane.
Confirm rules before buying material
Ask the building department about permits, setbacks, anchoring, frost-depth foundations, size limits, and accessory-structure rules. Contact the utility-location service before excavation. HOA restrictions and property easements may apply even when a building permit is not required.
Select a dry, accessible site
Choose ground that drains away from the house and does not collect roof runoff. Leave working clearance around the future walls for painting, repairs, and roof drainage. Consider the route for bringing in panels, lumber, or a prefabricated shed before a fence traps the site.
Lay out a square pad
- Mark a rectangle extending beyond the shed footprint on every side.
- Measure both diagonals and adjust until equal.
- Strip sod, roots, and soft organic topsoil.
- Establish finished elevation high enough to prevent surrounding runoff from entering.
- Install a suitable geotextile only when needed for soil separation.
Build and compact the gravel base
Use locally available angular crushed aggregate that compacts, not decorative round stone alone. Add material in shallow lifts and compact each lift. Maintain a level support plane while allowing the surrounding grade to shed water away. The pad should not become a bathtub with impermeable edging.
Support skids and floor framing
Place ground-contact-rated skids parallel to the floor-joist load path according to the shed plan. Approved solid supports may be used where the design allows; do not stack loose hollow blocks or random pavers to correct a steep slope. Check all skid tops with a laser or long level before framing.
| Check | Why it matters |
|---|---|
| Pad square | Floor and wall panels fit correctly |
| Support tops level | Doors remain aligned |
| Gravel extends beyond walls | Reduces splash and edge erosion |
| Anchoring installed | Addresses uplift and movement |
Frame the floor from an approved plan, crown joists consistently, and protect cut ends as required by the treatment manufacturer. Install rodent-resistant details without blocking ventilation or drainage.
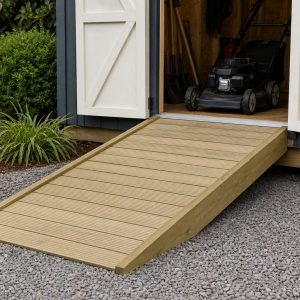
After the shed is complete, add the shed ramp and organize long tools with the existing garden tool rack.
Verify drainage after a real storm
A level gravel pad must also release water beyond the shed footprint. Observe where roof runoff and uphill surface water travel during rain. Add appropriate grading or drainage before the building blocks inspection access. Water should not pond against skids, wash fines out of the base, or discharge onto a neighboring property.
- Keep organic topsoil and roots out of the compacted structural zone.
- Compact compatible aggregate in controlled lifts rather than one deep layer.
- Check diagonal measurements and elevation at every stage.
- Use foundation and anchorage details suitable for local wind and frost conditions.
Reinspect after the first wet season for settlement, erosion, and doors becoming out of square. Small corrections to drainage are easier before a distorted floor transfers problems to walls and roofing.
Common questions
Can a shed sit directly on gravel?
Some manufactured sheds use approved runners or floors over a prepared pad. Follow the shed instructions and local requirements; wall panels should not simply contact loose stone.
How far should gravel extend past a shed?
Many projects use several inches to about a foot beyond the walls for drainage and maintenance, but roof drip lines and local erosion conditions may justify more.