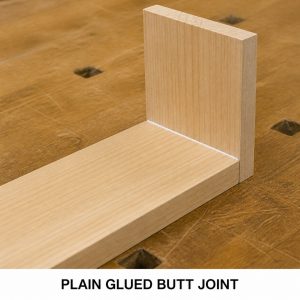
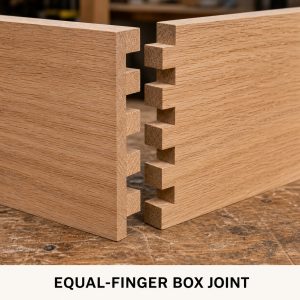
Project planning guide
Before you build
Use the reference image and planning notes as a starting point. Confirm dimensions, loads, materials, local codes, and site conditions before purchasing or cutting.
- Type of Wood Joints
- 10 reference images
- Print-friendly guide
Advanced joinery uses geometry not only to align parts but also to resist withdrawal, reinforce a corner, lengthen a member, or create a connection that can be tightened and disassembled. Each image below isolates one joint so its locking surfaces are easier to read before you study measured plans or make a test piece.
Quick answer: Complex joints should be developed from full-size layout and scrap prototypes. Understand the load direction, preserve enough material around every notch or mortise, and use verified dimensions for the actual species, stock size, and project.
10 wood joints in this guide
- Through Dovetail Joint
- Keyed Miter Joint
- Sliding Dovetail Joint
- Spline Miter Joint
- Scarf Joint
- Birdsmouth Joint
- Pegged Mortise-and-Tenon Joint
- Tusk Tenon Joint
- Wedged Through Tenon
- Double Mortise-and-Tenon Joint
1. Through Dovetail Joint
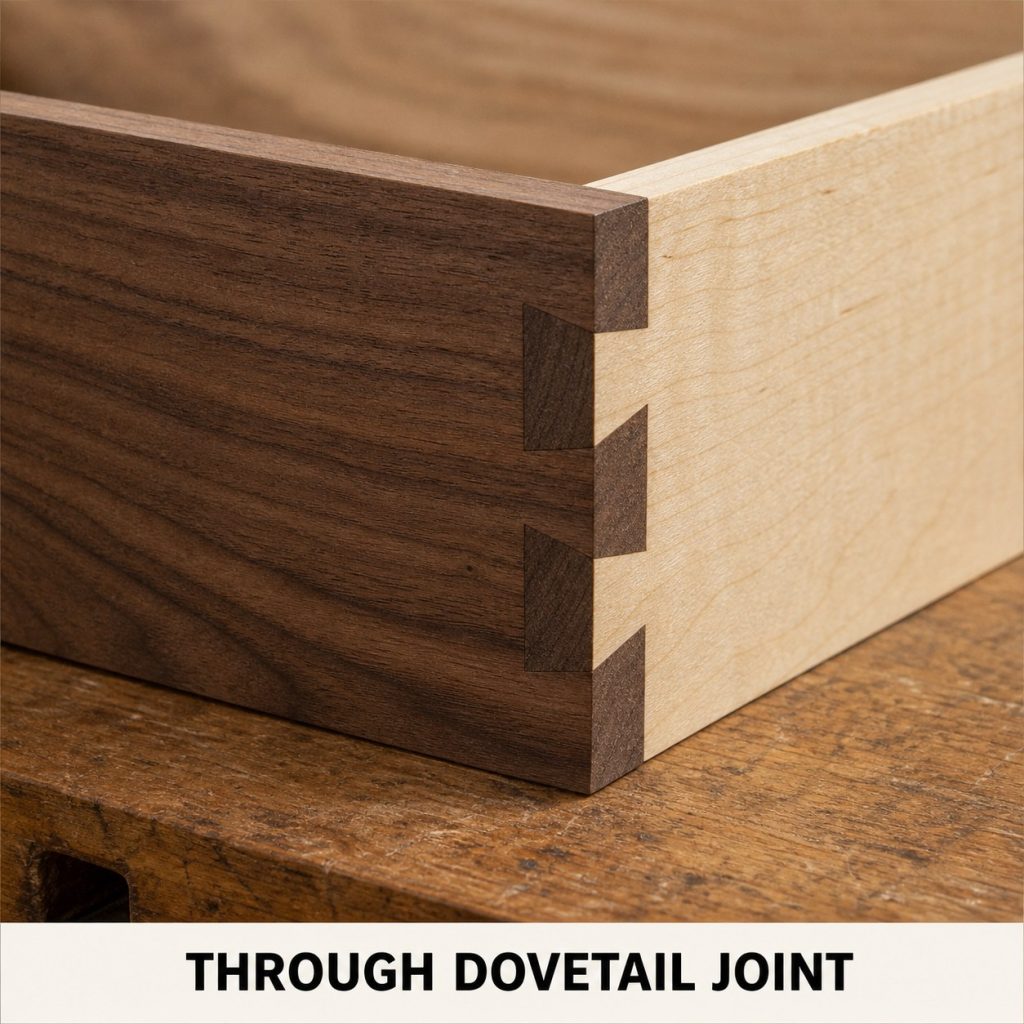
How it fits: Flared tails on one board enter matching angled spaces between pins on the other. The completed pattern is visible on both outside faces.
Typical uses: Through dovetails are classic choices for drawers, chests, carcasses, trays, and exposed box corners.
Workshop check: Keep the baseline consistent with stock thickness and transfer the first board directly to the mating board instead of relying on separate measurements.
2. Keyed Miter Joint
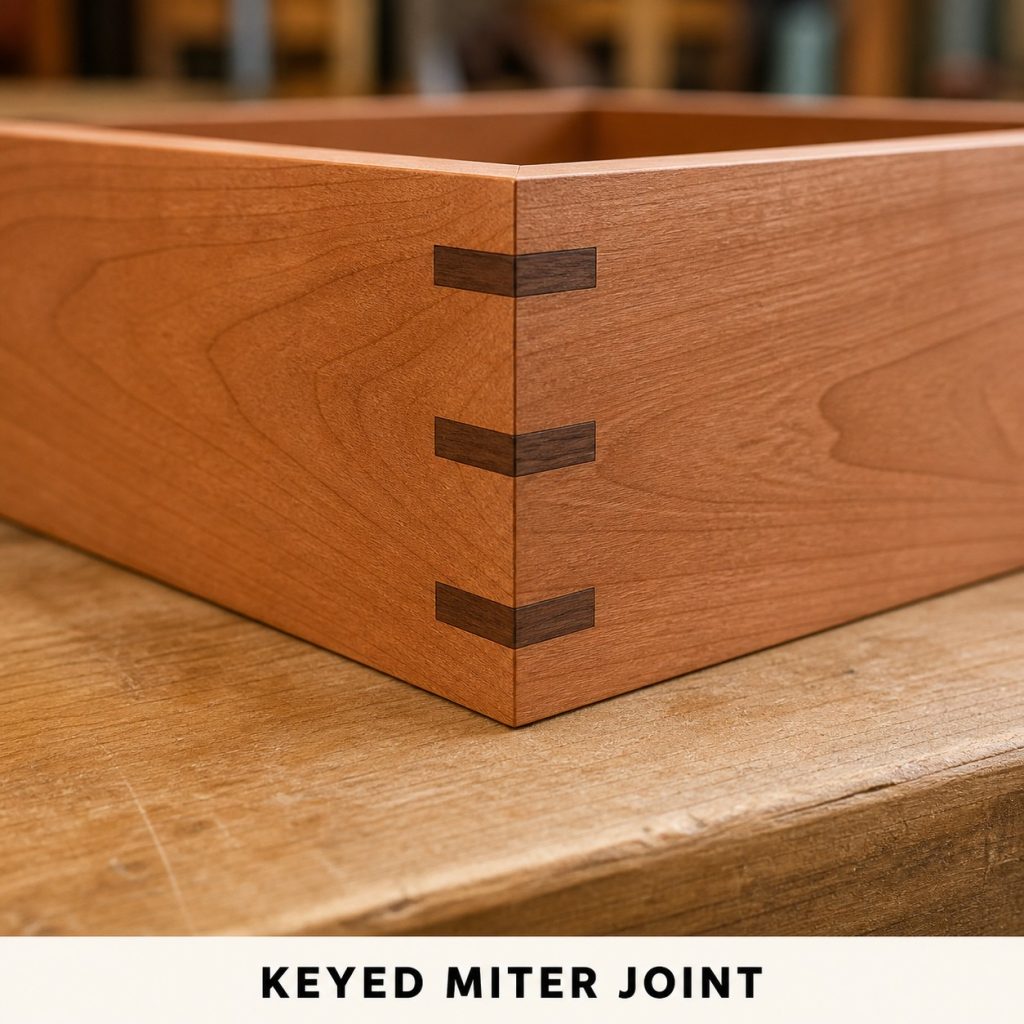
How it fits: Two 45-degree faces form a mitered corner. Cross-grain keys inserted through kerfs span the seam and add reinforcement while becoming a decorative detail.
Typical uses: Keyed miters suit boxes, frames, trays, cases, and small furniture where a clean corner and contrasting accent are desired.
Workshop check: Glue and square the miter before cutting the kerfs. Keep key grain oriented across the joint and avoid cuts that leave fragile corner walls.
3. Sliding Dovetail Joint
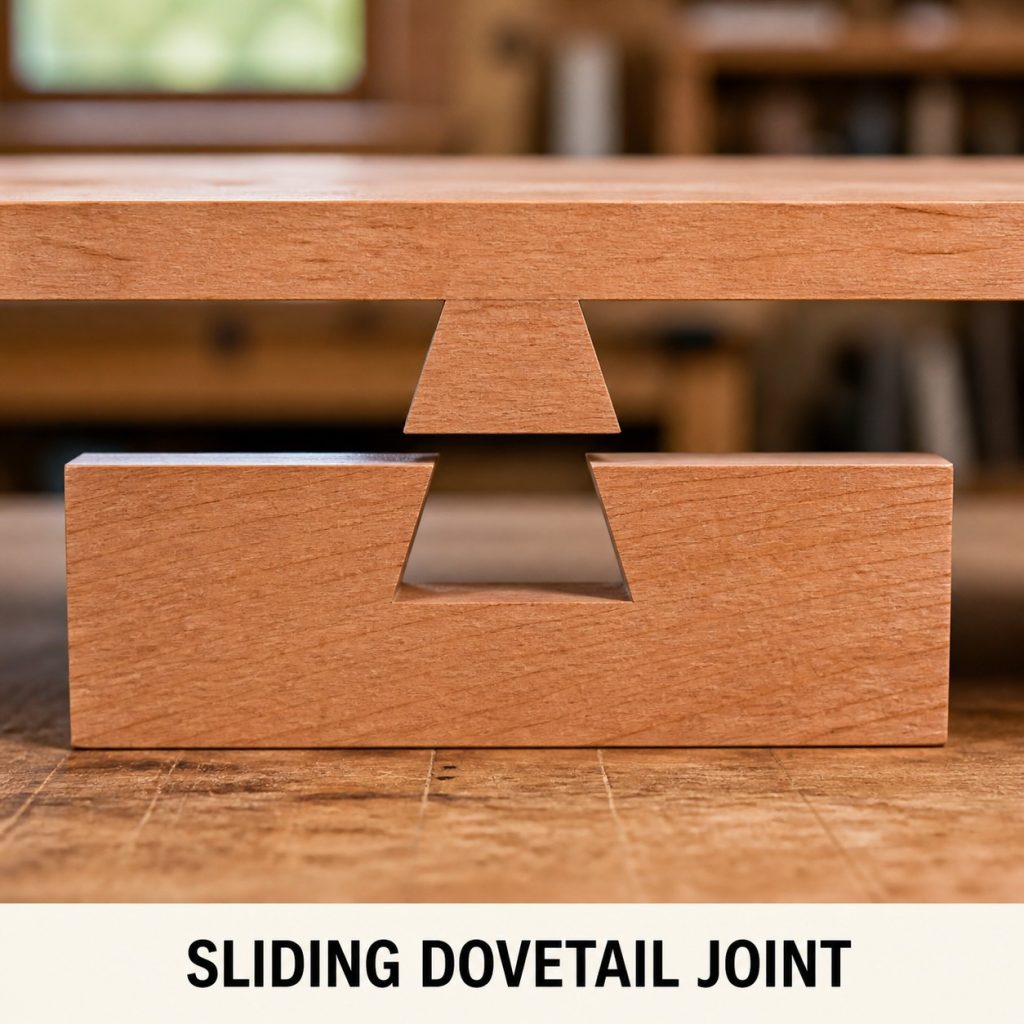
How it fits: A continuous flared tongue enters the open end of a matching undercut groove and slides along its length. The narrow mouth resists direct pullout.
Typical uses: Sliding dovetails locate shelves, dividers, cabinet parts, table battens, and drawer components.
Workshop check: Test the fit over the full travel length. Long joints need a little clearance because small taper or moisture changes can make them bind.
4. Spline Miter Joint
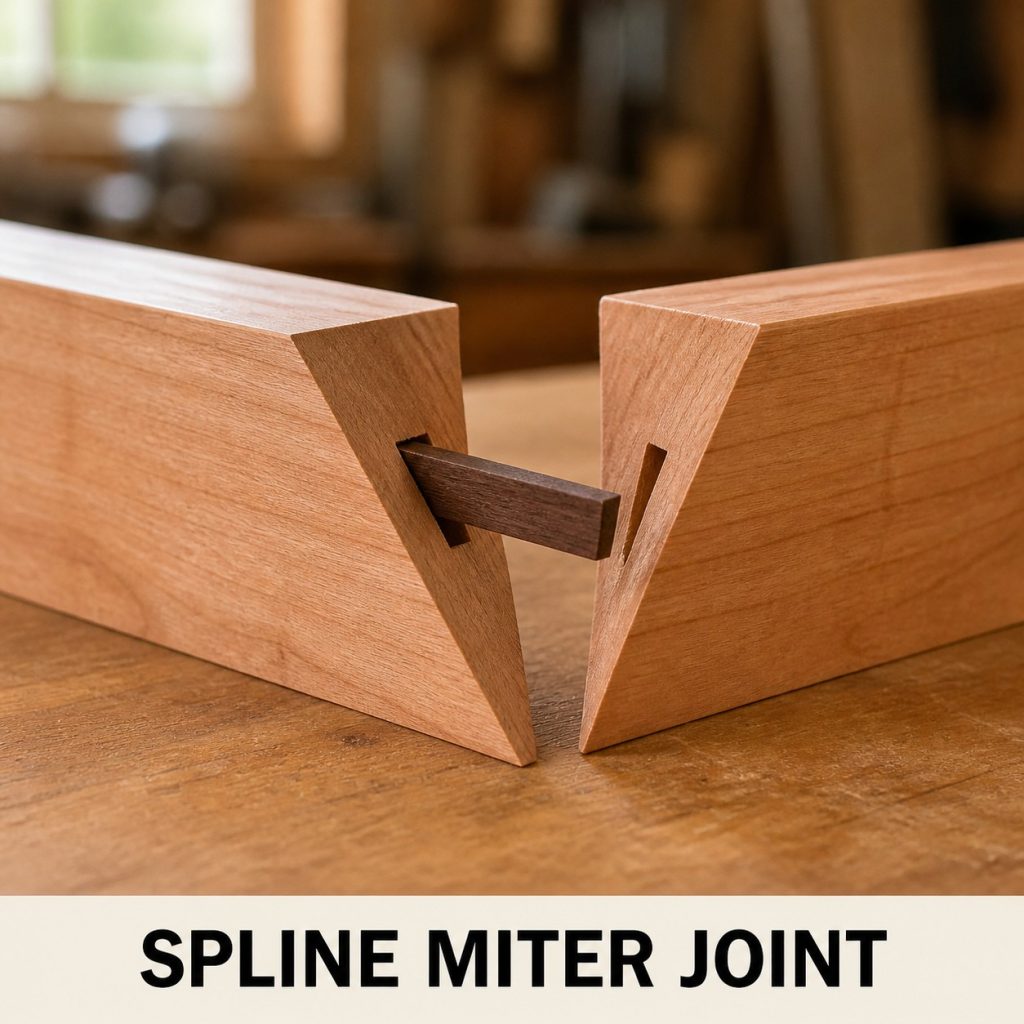
How it fits: Matching slots in two miter faces receive a flat spline. The spline aligns the corner and adds long-grain surface across the otherwise end-grain-heavy seam.
Typical uses: Spline miters are used in frames, boxes, cabinet cases, and architectural trim.
Workshop check: Center both slots from the same reference face and make the spline grain run across the seam rather than parallel with it.
5. Scarf Joint
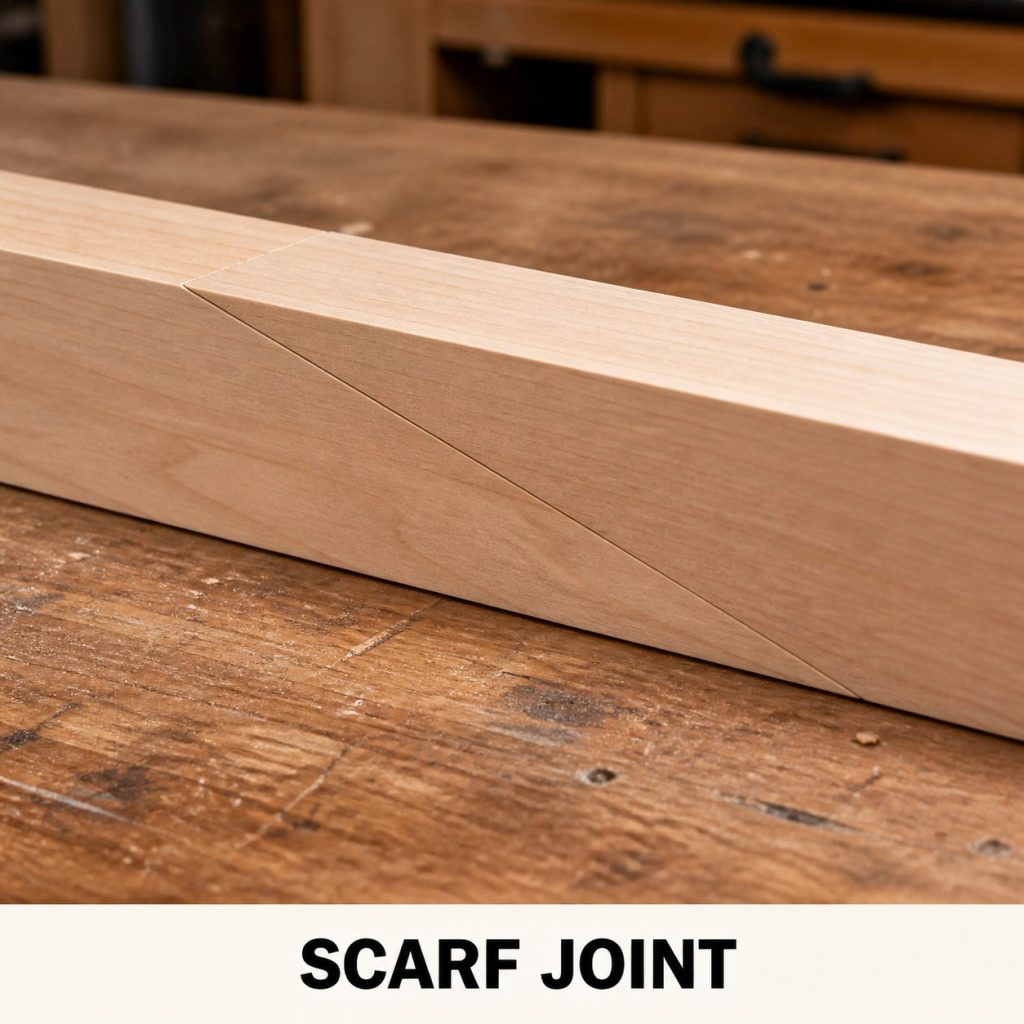
How it fits: Long mirror-image sloping faces overlap to lengthen a member while keeping the outside faces straight and flush.
Typical uses: Scarf joints appear in timber repair, traditional framing, long rails, boatbuilding, and restoration work.
Workshop check: Structural scarf joints require project-specific proportions, fasteners or keys, loading analysis, and professional verification; the image is only a geometry reference.
6. Birdsmouth Joint
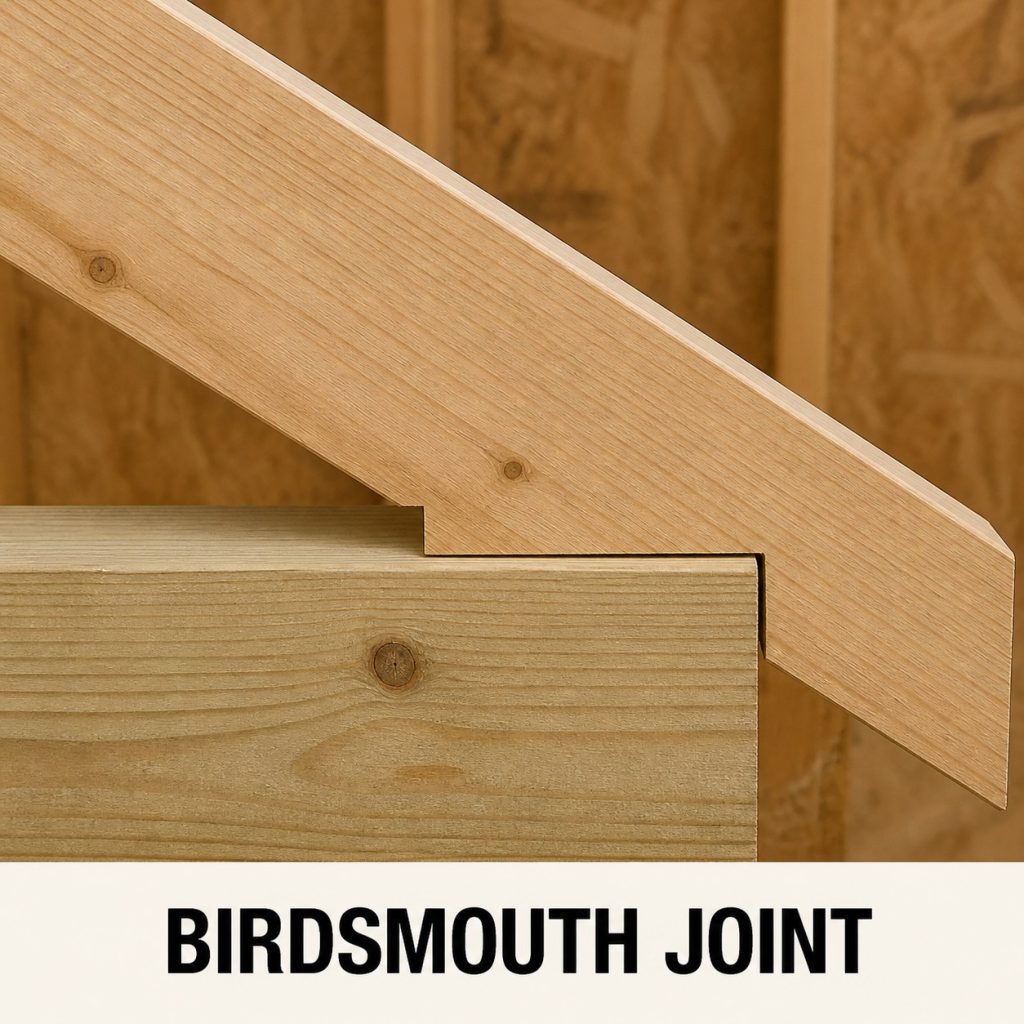
How it fits: A horizontal seat cut bears on the top plate while a vertical heel cut locates the sloped rafter against the plate edge.
Typical uses: Birdsmouth joints are associated with rafters bearing on wall plates in roof framing.
Workshop check: Do not size a structural rafter notch from an image. Follow approved plans and local code limits so the notch does not remove excessive section depth.
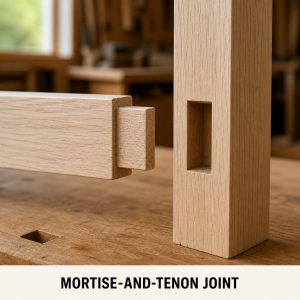
7. Pegged Mortise-and-Tenon Joint
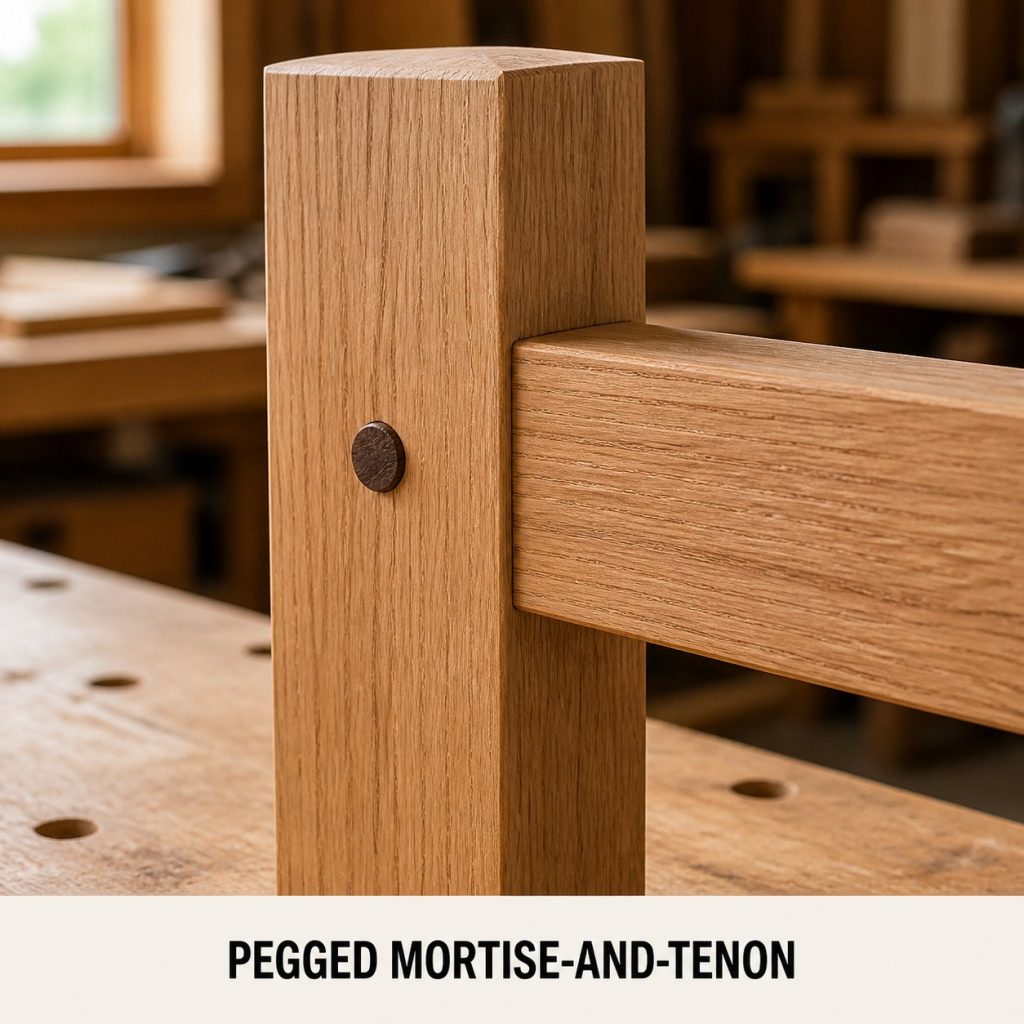
How it fits: After the tenon enters its mortise, a hardwood peg passes through the post and tenon to lock the parts together mechanically.
Typical uses: Pegged tenons are found in doors, gates, benches, tables, timber frames, and traditional furniture.
Workshop check: Provide enough wood around the peg hole and use a peg diameter appropriate for the real tenon. Drawboring offsets require careful layout and testing.
8. Tusk Tenon Joint
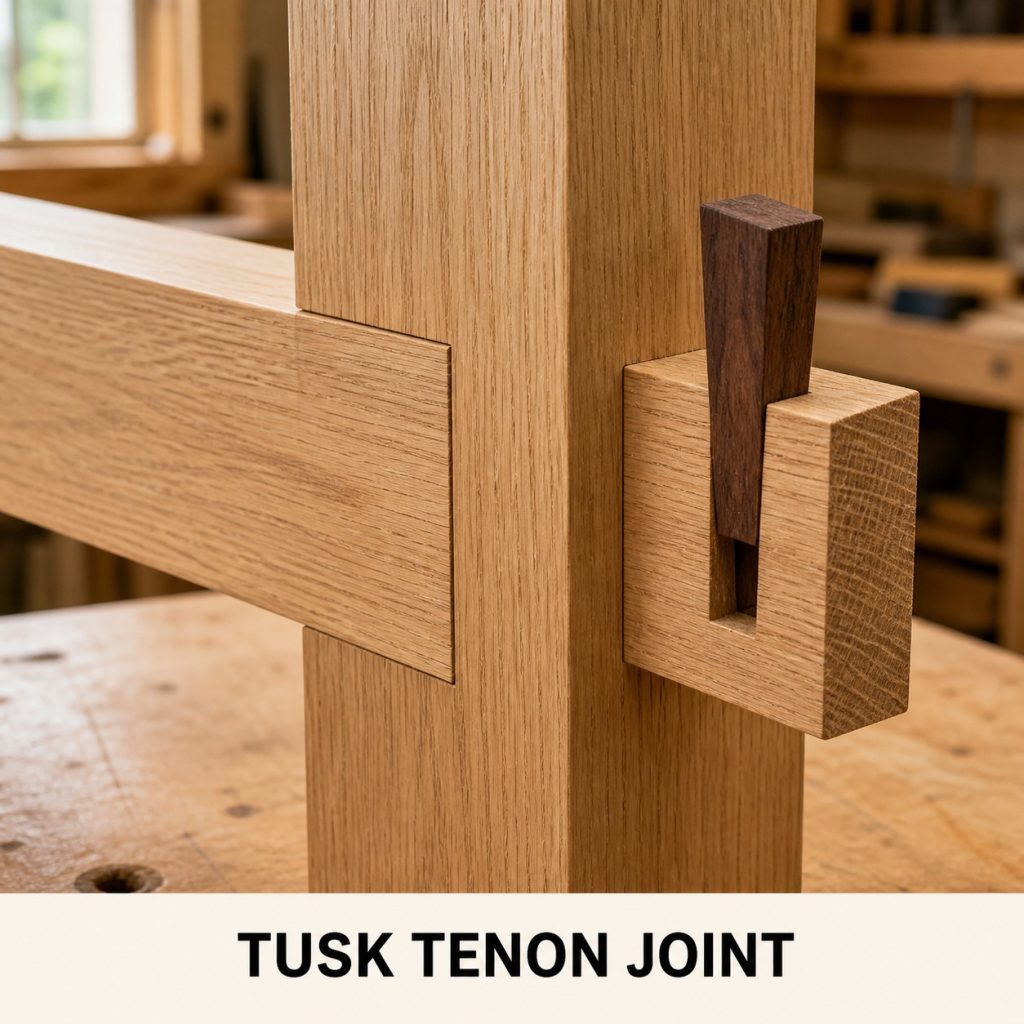
How it fits: A long tenon passes through the post and projects beyond it. A tapered wedge driven through a slot in the projecting tenon pulls the shoulder tight.
Typical uses: Tusk tenons are useful in trestle tables, workbenches, knock-down frames, and furniture designed for disassembly.
Workshop check: Place the wedge slot far enough from the tenon end to avoid breakout, and taper the wedge so tightening force is controlled.
9. Wedged Through Tenon
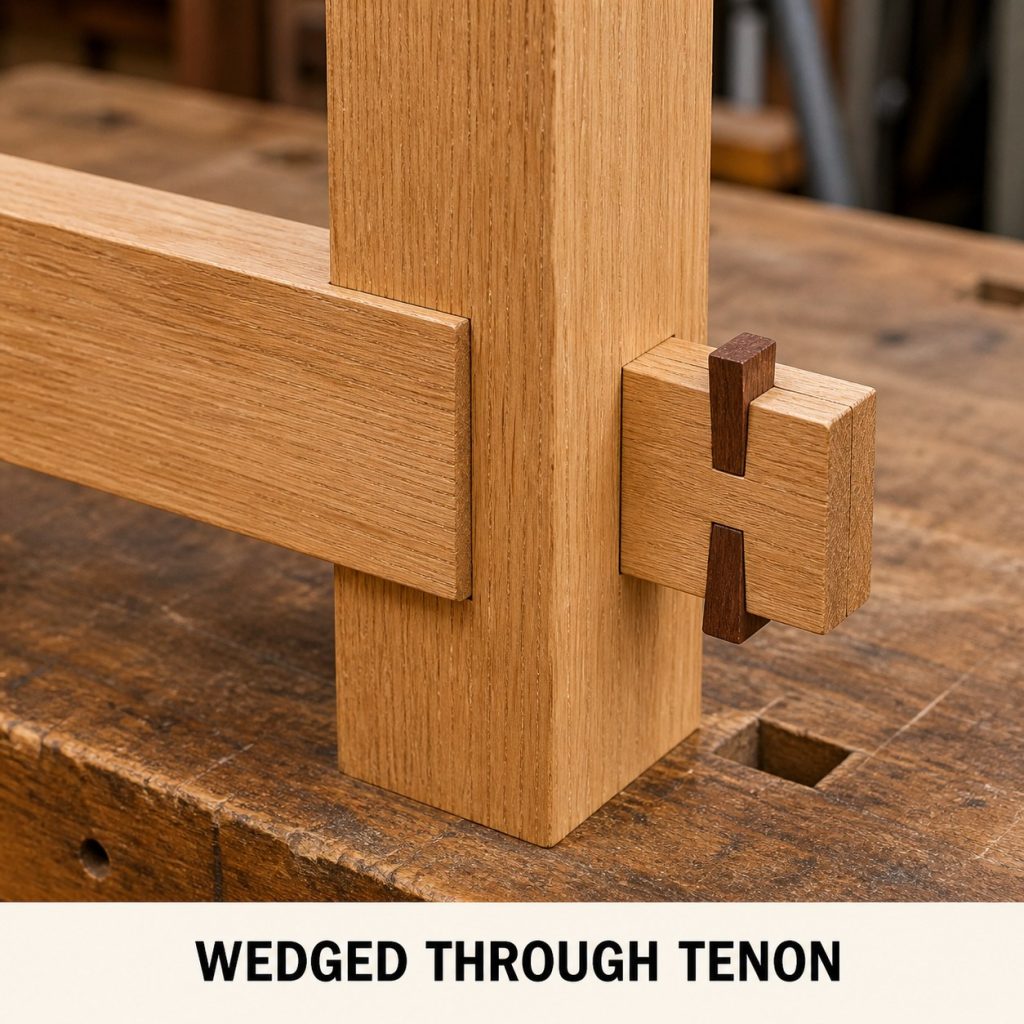
How it fits: A rail tenon passes completely through its mortise. Two wedges driven into kerfs in the projecting end spread and lock the tenon.
Typical uses: Wedged through tenons are used in benches, tables, doors, gates, frames, and traditional furniture.
Workshop check: Leave adequate wood around the mortise and beyond the wedge kerfs. Test wedge thickness and taper before final assembly.
10. Double Mortise-and-Tenon Joint
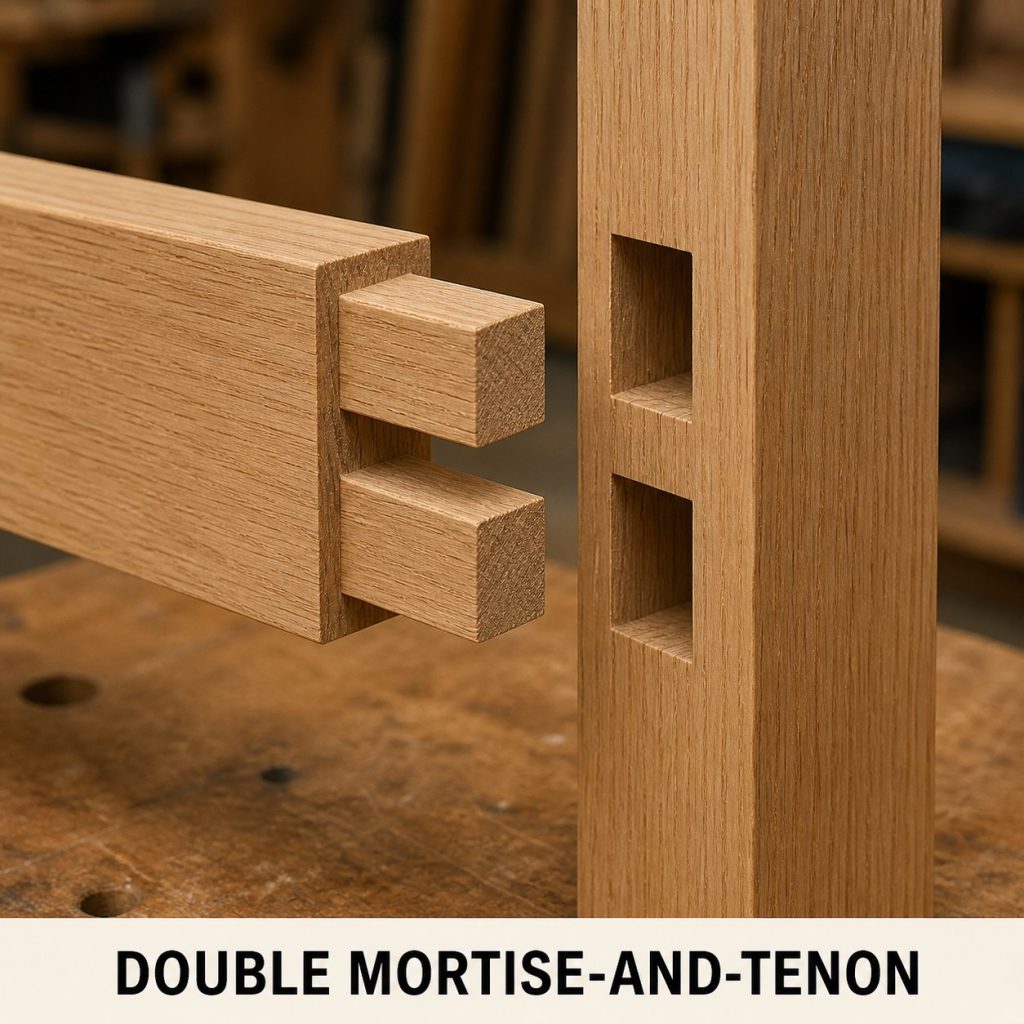
How it fits: Two parallel rectangular tenons enter two matching mortises at the same time, increasing glue area while preserving shoulders around the rail.
Typical uses: Double tenons suit wide rails in doors, tables, beds, gates, and heavy frames where a single wide tenon could remove too much material.
Workshop check: Keep both mortises parallel and referenced from the same face. Both tenons must seat simultaneously without twisting or forcing the post.
How to study a wood joint before cutting
- Identify the reference face and reference edge on every piece.
- Mark the mating parts directly from each other whenever practical.
- Make a full-size sample from scrap of the same thickness.
- Dry-fit before glue and check that shoulders close without forcing the joint.
- Confirm grain direction and leave enough material around notches, holes, and mortises.
- Use guards, hold-downs, eye protection, dust control, and the tool manufacturer’s instructions.
Frequently asked questions
Which wood joint should a beginner practice first?
A half-lap, rabbet, dado, dowel, or loose-tenon sample makes a useful starting point because the reference surfaces and fit are easy to inspect.
Should a joint be forced together?
No. A dry joint should assemble with controlled hand pressure or light tapping appropriate to the design. Excessive force can split thin cheeks, tails, or shoulders.
Are the dimensions shown in these photographs?
No. The images identify geometry and orientation only. Use measured plans or develop dimensions from the real material and required load.
Why make a test joint?
A scrap test reveals cutter width, machine setup, grain behavior, and fit before an error reaches a finished component.
Continue learning about wood joints
Read 10 Essential Wood Joints Every Beginner Should Know for ten more labeled joinery examples.